
Prepare the Floor
Preparing a floor for painting or refinishing is an important step in ensuring that the end result looks its best. Without proper preparation, the finish may not adhere as well and could lead to premature deterioration. To properly prepare a floor, there are several steps you should take.
The first step is to remove all furniture, rugs, door sills and other items from the room. This will make sure that no paint or debris gets stuck to these items during the process.
Once everything has been removed from the room, you can begin sweeping and vacuuming the floor thoroughly to remove any dirt, dust and debris that could prevent proper adhesion of paint or other finishes.
Next you will want to ensure that all nails are securely driven into any laminate floor boards present in the room. This helps ensure that they don’t move when walking on them after painting or refinishing has taken place.
If there are any holes in your flooring boards due to prior use of nails then these should be filled with wood putty or filler before beginning work on your project as this will also help secure them properly in place prior to painting or finishing taking place.
Remove the Laminate Flooring
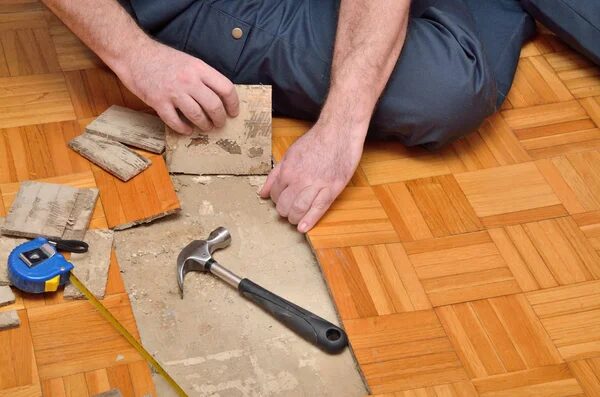
Removing laminate flooring can seem like a daunting task, but with the right tools and a little bit of patience it can be done quickly and easily. Here are some steps to help you remove your laminate flooring quickly and safely:
- Use a sharp utility knife to score along each plank several times until it’s easy to pry apart from its neighbor boards with a putty knife or crowbar without damaging adjacent boards or scratching your subflooring underneath them.
- Carefully pull up each plank of laminate one at a time to avoid damaging them and place them in an organized pile for disposal later on if necessary (check with your local landfill for their specific rules).
- Use an adhesive remover, such as Goo Gone, to clean any remaining adhesive residue left behind from the old flooring before laying down the new flooring material.
- When you’re done removing all of the planks, vacuum up any dust or debris that may have been created during this process before proceeding with installing new floors over top of your old ones.
Install New Flooring
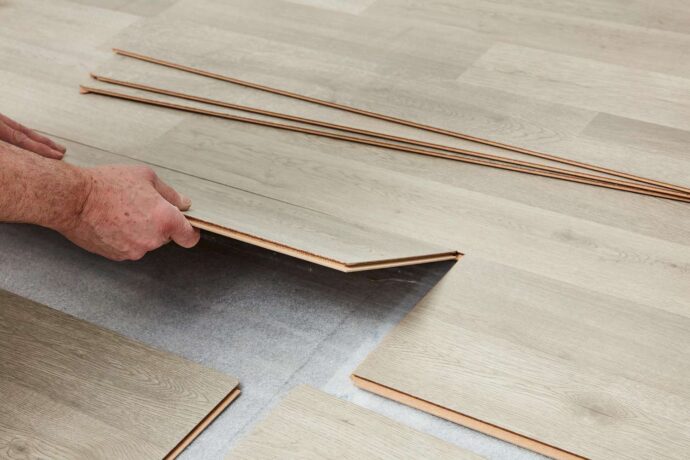
Installing new flooring is a great way to give your home a fresh, updated look. Whether you’re replacing existing flooring or starting from scratch, the process of installation is the same. Here are some tips for installing new floorboards:
First, measure out your new floorboards by cutting off planks that are slightly longer than needed before installing them in place of those you just removed (this will ensure there is enough material for an even fit).
Once all of the boards have been cut to size and laid out in their places it’s time to attach them securely. This can be done by applying construction adhesive directly onto the subflooring beneath each board along its edges and then firmly pressing it down into place.
Make sure to check each plank after installation and ensure that they are level with one another as this will help prevent any creaking or buckling later on.
If some boards need adjusting after they’ve been secured in place then use shims or wooden wedges to push them into position until they sit flat against one another.
Essential Tips For Choosing The Right Floor Board Replacement Materials
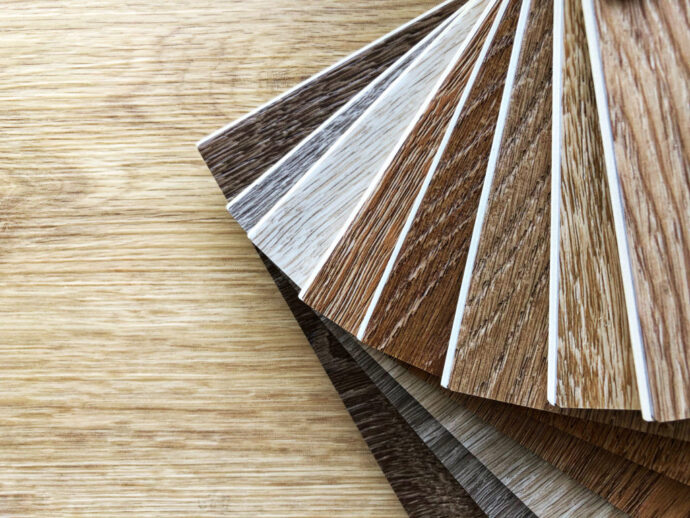
Understand Your Budget: One of the most important factors when choosing a floorboard replacement material is your budget. While some materials are more expensive than others, each has its own unique benefits that should be considered when making a decision.
Some popular materials that tend to cost more are hardwood or oak floorboards, bamboo or cork flooring. It’s important to know what you’re getting yourself into before making a purchase – sometimes it’s worth paying a bit more for a quality product that will last longer.
Know The Size And Shape Of The Room: Another factor that you’ll want to take into account is the size and shape of the room in which you plan on installing your new floorboard replacement material.
Some materials are designed specifically for specific areas such as hallways or bedrooms while others work well in any space. Once you have an idea of the size and shape of your room, you can begin narrowing down your options based on those parameters alone!
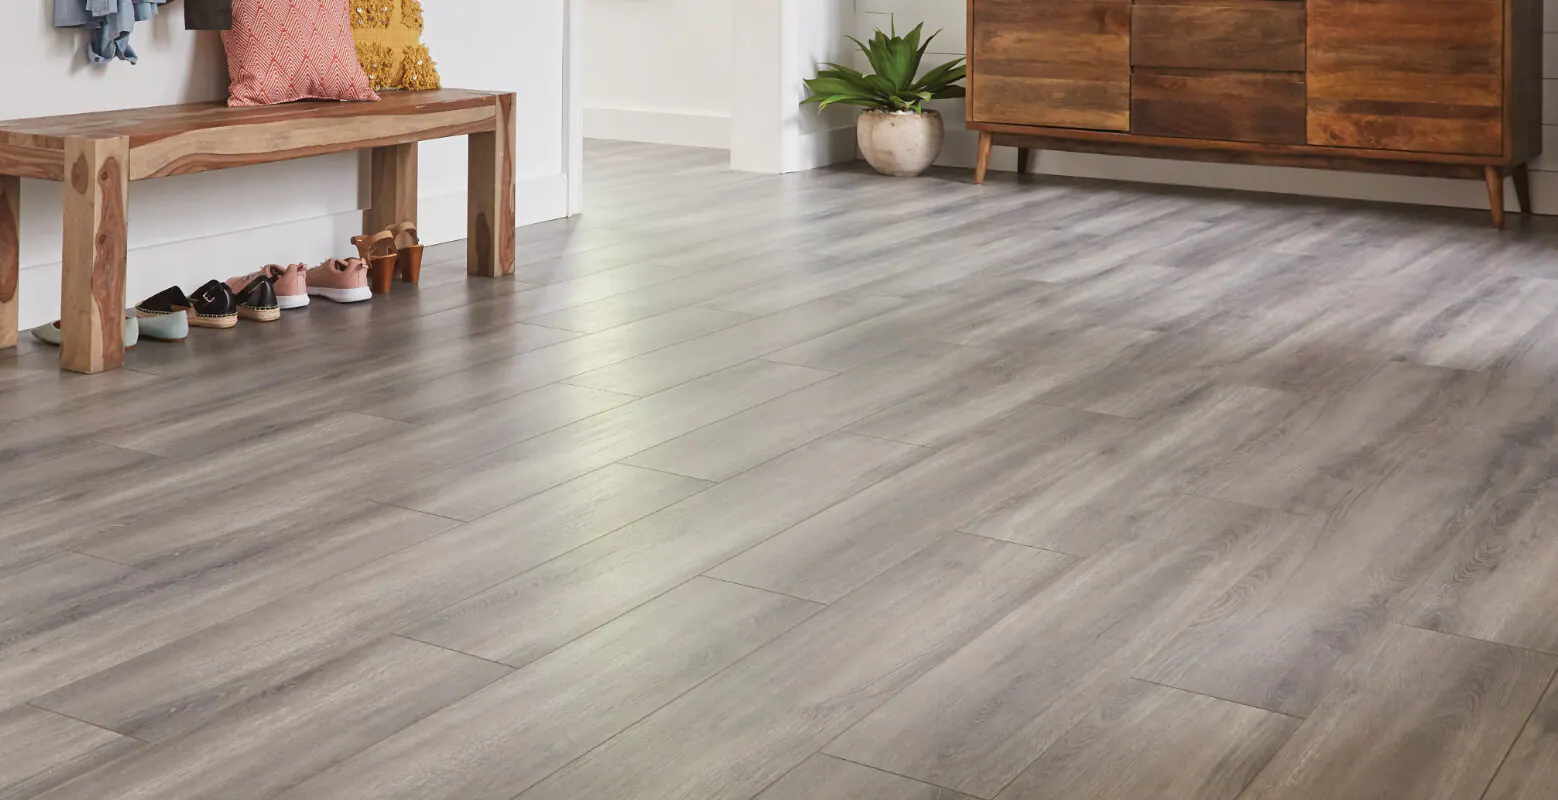
Consider The Overall Style Of The Home Interior: One final consideration when choosing a floorboard replacement material is how it will affect the overall style of your home interior. For example, if you have an indoor/outdoor living space with wooden decking above grade (or anywhere else), then wooden boards may be a better option than carpeted boards given their natural appeal and durability outdoors (not to mention their ability to stand up against dirt & other weather conditions).
Similarly, if you have an indoor/outdoor living space with stone or brick walls & floors – wood may not be ideal due to its susceptibility towards water damage & fading over time (carpet would likely be a better choice). Again – take into account what style of interior you’re aiming for before making any decisions!
Choose A Material That Emphasizes Comfort And Convenience: Another key factor when choosing a board replacement material is comfort and convenience – after all, who wants to spend hours trying to remove stubborn boards from walls.
To Sum Things Up
Replacing them can be a daunting task for any homeowner. However, by following the tips outlined in this blog post, you will be well-equipped to handle the job with confidence.
Knowing which type of laminate board to choose, understanding how to set up a working environment before replacing laminate floorboards, and understanding the difference between types of laminates are all key factors that will ensure a successful project. So don’t wait – get out there and start improving your home today!


